Use more of SpeechExec
Settings menu
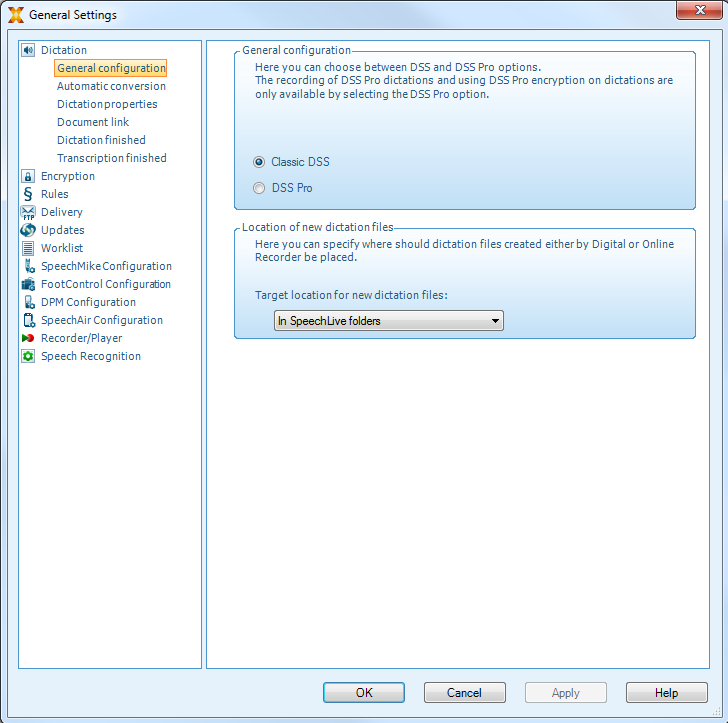
The General Settings window allows personalization of a variety of application settings, such as dictation options, encryption, user profiles, delivery rules, software updates and work list options. It also allows the configuration of a PocketMemo, SpeechMike, SpeechAir, SpeechOne, a foot control and recorder/ player settings.
Click Settings > General settings on the menu bar to open the Settings menu. The left pane contains the list of the available settings.
Select an option in the list to display the associated options on the right pane.
Click Apply to save the changes or click OK to save the settings and close the window.
 |
Note
All or some of the settings can be preconfigured and locked by your system administrator. Locked settings are read-only.
Foot Control Configuration Wizard
Use the Foot Control Configuration Wizard to change the pedal functions to your preferred configuration.
Connect the foot control to the PC.
Start Philips SpeechExec software.
Click Settings > General settings on the menu bar of SpeechExec to open the Settings menu and select Foot Control Configuration > Foot Control Wizard from the list on the left side.
Click the Start Wizard... button to open the wizard. Follow the on-screen instructions to customize the foot control.
Click the Finish button to close the wizard and save the new settings.
Playback options
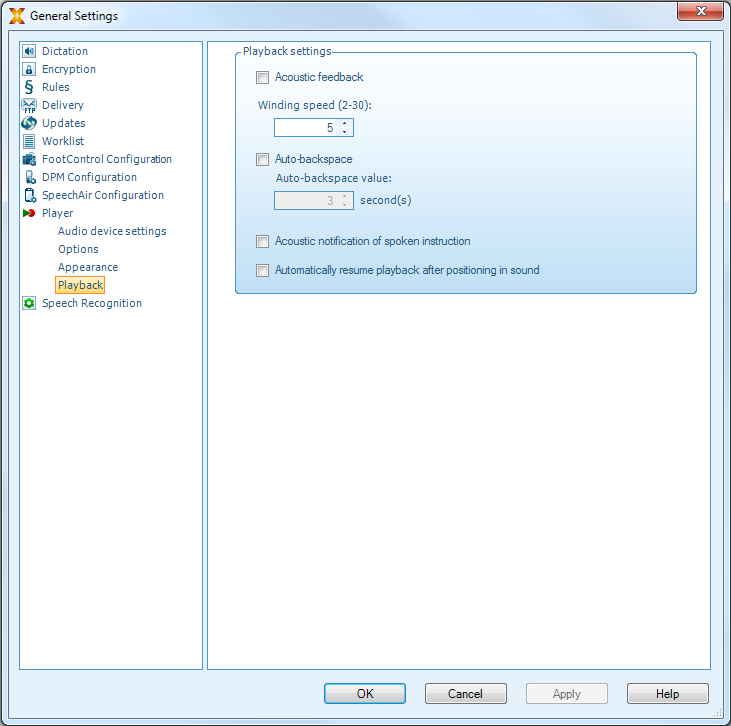
Adjust the behavior of the player to your own preferences. SpeechExec allows playback options to be customized, such as acoustic feedback during fast forward or rewind, winding speed, autobackspace and acoustic notification for spoken instructions.
Click Settings > General settings on the menu bar to open the Settings menu and select Player > Playback from the list on the left side.
Define the preferred behavior for the player:
Acoustic feedback: activate this option to hear the recording during fast forward or rewinding.
Winding speed: set the speed for rewind and fast forward.
Auto-backspace: activate this option and specify the number of seconds to rewind a sound file when restarting playback.
Acoustic notification of spoken instruction: activate this option to hear a beep at the start of a spoken instruction during playback.
Automatically resume playback after positioning in sound: activate this option to automatically continue playback after rewinding or forwarding to a desired position in the dictation file.
Click OK to save the settings and close the window.
Use Philips SpeechLive
Philips SpeechLive is a cloud dictation solution that allows you to store, access and share dictation files from anywhere in the world and around the clock while guaranteeing maximum file security.
Before you access and transcribe dictations in SpeechLive, you need to have a valid SpeechLive account for transcriptionists. For more information, contact your administrator or visit www.speechlive.com.
Configuring SpeechLive
Click Start SpeechLive
 on the toolbar.
X The SpeechLive configuration wizard window opens.
Enter your Email address and Password.
Click Next.
X The SpeechExec transcription software is now linked to your SpeechLive user account.
Note
For more information about how to use SpeechLive and SpeechLive services, visit speechlive.com/help.